
TL;DR:
- A simple batch cooking system can save time, reduce stress, and ensure baby is well-nourished.
- Essential tools include ice cube trays, high-powered blenders, and labeled storage containers.
- Focus on iron-rich foods, vitamin C sources, and safe introduction to prevent allergies and support growth.
Every parent knows that moment: it’s 5 p.m., your baby is fussing, and you’re staring into the fridge with zero plan. Daily feeding can feel like a full-time job on top of everything else you’re already managing. The good news is that a simple, repeatable meal prep system can cut that daily stress dramatically, keep your baby well-nourished, and actually give you back some breathing room. This guide walks you through the tools you need, how to batch cook for a full week, which ingredients matter most, and how to handle allergies and special needs, so feeding time becomes something you look forward to instead of dread.
Table of Contents
- What you need for baby meal prep
- Step-by-step: How to batch cook and portion for a week
- Best ingredients and essential nutrition for babies
- Purees, baby-led weaning, and combos: What works best?
- Safety, allergies, and adapting for special needs
- Why perfect baby meal prep isn’t the goal: Real-world lessons
- Level up your baby meal prep with the right essentials
- Frequently asked questions
Key Takeaways
| Point | Details |
|---|---|
| Batch prep saves time | Preparing baby meals in bulk each week makes feeding routines less stressful. |
| Iron and variety matter | Focus on iron-rich foods and try a variety of ingredients for balanced nutrition. |
| Safety is essential | Always follow food safety and allergy guidelines for every meal you prep. |
| Flexible methods work | Choose purees, baby-led weaning, or a mix based on your baby’s needs and your family. |
| Consistency beats perfection | Meal prep is about making life easier, not striving for perfect meals every time. |
What you need for baby meal prep
Before you dive into prepping, it’s crucial to have the right supplies and understand the basics. Starting with the right gear makes everything faster, safer, and far less frustrating.
Essential tools to have on hand:
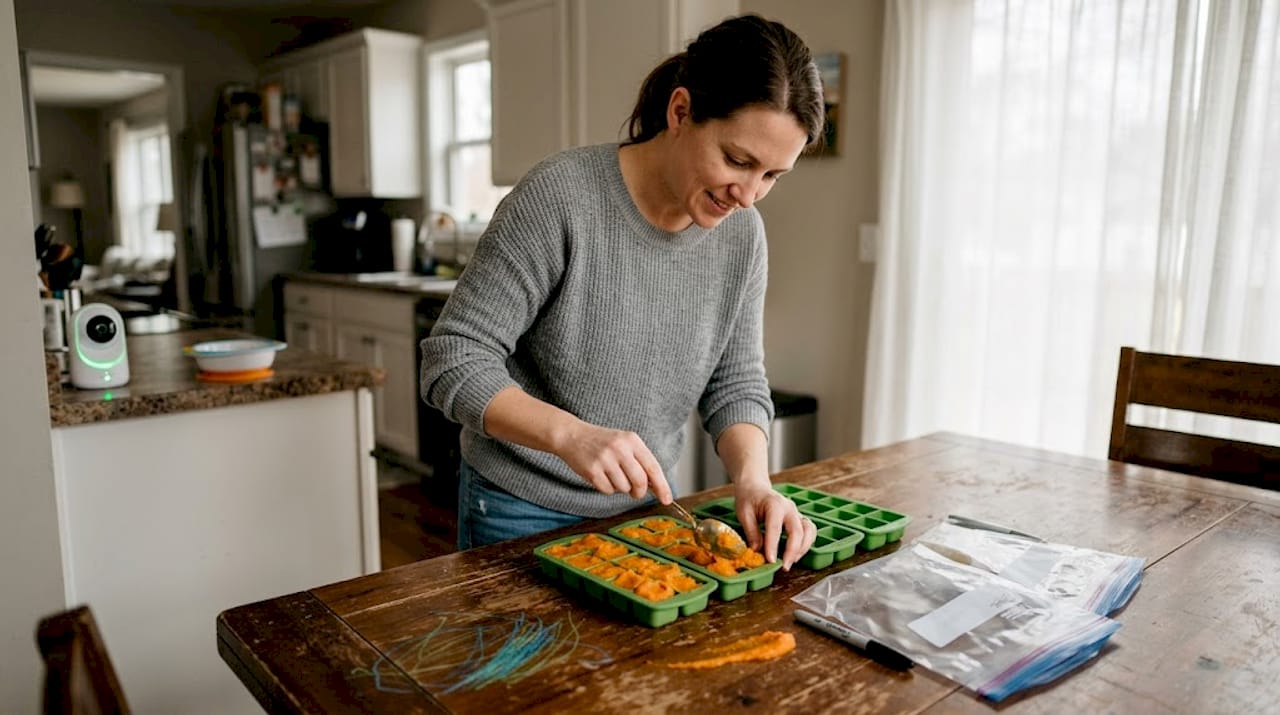
- Ice cube trays and silicone molds (perfect for portioning purees)
- A high-powered blender or immersion blender
- BPA-free airtight storage containers
- Freezer-safe zip bags
- Waterproof labels and a permanent marker
- A fine-mesh strainer for smooth textures
Here’s a quick-reference table so you can see exactly why each tool earns its spot in your kitchen:
| Tool | Key benefit |
|---|---|
| Ice cube trays | Portion-perfect freezing for purees |
| Silicone molds | Easy pop-out, flexible, and easy to clean |
| High-powered blender | Smooth, lump-free purees in seconds |
| Airtight containers | Prevents freezer burn and contamination |
| Waterproof labels | Tracks prep dates and contents clearly |
| Fine-mesh strainer | Removes fibrous bits for younger babies |
When it comes to ingredients, focus on foods that deliver real nutritional value. Homemade purees are more nutritious and more affordable than commercial options, but they do require strict food safety practices. Prioritize iron-rich proteins like pureed chicken, lentils, and egg yolk. Pair them with vitamin C sources such as sweet potato, mango, and broccoli to help your baby absorb iron more effectively. For allergens, introduce them one at a time and follow your pediatrician’s guidance.
Food safety is non-negotiable. According to USDA storage guidelines, homemade baby food keeps in the refrigerator for 1 to 2 days and in the freezer for up to 3 to 4 months. Always cool food completely before freezing, and never refreeze thawed portions. For more foundational guidance, check out these baby feeding tips to build a strong starting point.
Pro Tip: Spend 60 to 90 minutes on Sunday prepping a full week of portions. Label every container with the food type and date, then freeze in single-serving amounts. Future you will be very grateful.
Step-by-step: How to batch cook and portion for a week
With these essentials ready, you’re set to tackle efficient batch cooking. The process is simpler than it sounds once you break it into clear steps.
- Shop with a plan. Write out a weekly menu before you go to the store. Buy in bulk where you can.
- Wash and prep all produce. Peel, chop, and sort everything before you cook. This saves time and keeps your workspace organized.
- Cook in batches. Steam or roast vegetables and proteins together. Multitask by running the blender while something else cools.
- Blend and strain. Puree each food group separately so you can mix and match flavors during the week.
- Cool completely. Spread purees on a clean tray and let them reach room temperature before portioning.
- Portion into trays or molds. Fill ice cube trays, press flat, and freeze for 2 to 3 hours until solid.
- Transfer and label. Pop frozen cubes into labeled freezer bags. Include the food name and date.
Here’s a sample weekly menu to give you a real-world picture:
| Day | Meal 1 | Meal 2 |
|---|---|---|
| Monday | Lentil and carrot puree | Mashed banana |
| Tuesday | Pureed chicken and sweet potato | Pear and oat blend |
| Wednesday | Egg yolk and broccoli mash | Avocado puree |
| Thursday | Lentil and spinach blend | Apple and cinnamon puree |
| Friday | Pureed salmon and peas | Mango and yogurt |
Batch prepping for 60 to 90 minutes covers a full week of meals, and freezing preserves nutrition remarkably well. Homemade meals can also cost up to 30% less than store-bought pouches, and you control every ingredient. That’s a real win for your budget and your baby’s health.
When thawing, always move portions from the freezer to the fridge the night before. Never thaw at room temperature. Once a portion is thawed and served, discard any leftovers from that meal. For more structure, explore these baby feeding routines to pair your prepped meals with a consistent daily schedule.
Pro Tip: Freeze a few single-ingredient cubes separately so you can combine flavors fresh each day. This keeps mealtime interesting and lets you rotate variety without extra cooking.
Best ingredients and essential nutrition for babies
With batch prepped portions sorted, maximize their nutrition with the right ingredient choices. What goes into those little portions matters enormously for your baby’s growth.
Three nutrients deserve the most attention: iron, vitamin C, and healthy fats. Iron supports brain development and is the nutrient babies are most likely to run short on after six months. Vitamin C boosts iron absorption when eaten together. Healthy fats from foods like avocado and full-fat yogurt support rapid brain growth.
Best foods to include:
- Lentils and pureed meats (iron-rich proteins)
- Eggs, especially the yolk (iron, healthy fats, and choline)
- Soft cheese and full-fat yogurt (calcium and fat)
- Oats (iron and fiber)
- Fruits: banana, mango, pear, blueberries
- Vegetables: sweet potato, peas, broccoli, carrots, spinach
Foods to strictly avoid:
- Honey (risk of infant botulism under 12 months)
- Added salt or sugar
- Cow’s milk as a main drink before 12 months
- Choking hazards: whole grapes, raw carrots, nuts
- High-mercury fish like swordfish or shark
The AAP recommends 750 to 900 calories per day for babies aged 8 to 12 months, with a strong emphasis on iron-rich foods and varied textures. Don’t be discouraged if your baby refuses a new food. Research consistently shows that repeated exposure, sometimes 10 to 15 tries, is what leads to acceptance. Keep offering without pressure.
Safety reminder: Always supervise your baby during meals. Opt for soft, mashable textures and cut foods into small, manageable pieces to reduce choking risk.
For a broader look at safe feeding practices and how nutrition connects to your baby’s overall wellbeing, this feeding routine guide is worth bookmarking.
Pro Tip: Pair lentils with a squeeze of orange juice or a side of mango. The vitamin C in those foods significantly boosts how much iron your baby actually absorbs from the meal.
Purees, baby-led weaning, and combos: What works best?
Now that nutrition basics are covered, let’s explore the main meal prep methods you can choose. There’s no single right answer here, and understanding each approach helps you pick what fits your baby and your life.
Purees involve blending foods into smooth or slightly textured consistencies. They’re ideal for younger babies just starting solids and for parents who want precise portion control. Baby-led weaning (BLW) skips spoon-feeding and offers soft finger foods from the start, letting babies self-feed and explore textures. A combo approach uses both, offering purees at some meals and soft finger foods at others.

| Method | Benefits | Challenges | Ideal foods | Safety notes |
|---|---|---|---|---|
| Purees | Easy to control portions and texture | Less texture variety early on | Sweet potato, lentils, fruit | Cool before serving, no added salt |
| Baby-led weaning | Builds independence and texture tolerance | Messier, requires close supervision | Soft banana, steamed broccoli, egg strips | Must be soft enough to mash with gums |
| Combo | Flexible, covers more nutritional bases | Requires more prep variety | Mix of above | Supervise all meals |
BLW and purees are both safe when meals are varied and responsive to your baby’s cues. A combo approach is often what works best for real families. As your baby grows, gradually increase texture, moving from smooth to mashed to soft chunks over several months.
“Both methods support healthy development when iron is prioritized and adult supervision is constant.”
For families with babies who have sensitive skin or known sensitivities, connecting food choices to skin health matters too. This resource on baby skincare and allergies offers helpful context on managing reactions holistically.
Safety, allergies, and adapting for special needs
No meal prep guide is complete without prioritizing safety and adapting for unique baby needs. Allergies are one of the biggest concerns parents have when starting solids, and rightly so.
Allergy introduction checklist:
- Introduce one new food at a time, every 3 to 5 days
- Offer the new food in the morning so you can monitor reactions during the day
- Watch for symptoms: hives, swelling, vomiting, or difficulty breathing
- Keep a simple food diary to track what was introduced and when
- If your family has a history of food allergies, talk to your pediatrician before introducing top allergens
Introduce single foods to watch for allergies, monitor for at least two hours after feeding, and adapt your approach during teething or illness when your baby’s appetite may drop significantly.
Key rule: Only introduce one new food every few days. This is the clearest way to identify what caused a reaction if one occurs.
For premature babies, always use their corrected age, not their birth age, when deciding what textures and foods to introduce. During teething, offer cooler foods and softer textures. When your baby is sick, scale back to familiar, gentle foods and focus on fluids. These small adjustments make a big difference in keeping feeding positive and stress-free. For babies with sensitive skin alongside dietary sensitivities, these allergy-friendly feeding tips can help you manage both at once.
Why perfect baby meal prep isn’t the goal: Real-world lessons
Here’s something no perfectly curated meal prep reel will tell you: even the most organized parents have weeks where the freezer stash runs out, the baby refuses every single thing you made, and dinner ends up being banana and yogurt again. That’s not failure. That’s Tuesday.
Meal prep success is about consistency over time, not perfection every day. Babies’ appetites shift constantly. A food they loved last week might get thrown on the floor this week. Building realistic feeding routines means designing a system that bends without breaking. The parents who struggle most are often the ones chasing an ideal routine that doesn’t account for teething, growth spurts, or just a bad day.
The best meal prep system is the one your family will actually stick to. Even nutritionists’ babies refuse food sometimes. Flexibility, humor, and a well-stocked freezer will take you much further than any rigid plan ever could.
Level up your baby meal prep with the right essentials
Ready to make baby meal prep even easier? Here’s how to get set up for success.

Having the right tools turns a stressful routine into a smooth one. The 8-piece silicone baby feeding set from Skin-Styles.com is BPA-free, includes suction plates, bowls, and a bib, and is designed to support self-feeding as your baby grows. It’s the kind of practical tool that makes the advice in this guide easier to actually follow every day. For more feeding gear, storage solutions, and family care products, browse more baby care essentials and find everything you need in one place.
Frequently asked questions
How long can homemade baby food be stored safely?
Homemade baby food stays fresh in the refrigerator for 1 to 2 days and can be frozen for up to 3 to 4 months. Always label containers with the prep date so you never have to guess.
What are the best foods to start with when introducing solids?
Begin with single-ingredient, iron-rich first foods like pureed meats, lentils, or egg yolk, then add soft fruits like banana or avocado once your baby is comfortable.
Is baby-led weaning or purees better for introducing solids?
Both methods are safe and effective when meals are varied and iron-rich. Many families find a combination of both approaches works best in practice.
How do I identify and manage food allergies in my baby?
Introduce one new food at a time, watch for reactions for at least two hours, and contact your pediatrician immediately if you notice hives, swelling, or breathing changes.
How much should my 8 to 12 month old eat each day?
Babies in this age range need 750 to 900 calories daily, with roughly half coming from breast milk or formula and the rest from solid foods.