
Most American parents are surprised to learn that bottles and feeding sets can harbor invisible bacteria even after regular washing. Protecting your infant from harmful germs relies on more than a quick scrub. Understanding the right process for cleaning, sterilizing, and storing your baby’s feeding equipment gives you greater peace of mind and can reduce the risk of illness. This step by step guide will help every American caregiver create a safer feeding routine with confidence.
Table of Contents
- Step 1: Gather and Inspect All Feeding Set Components
- Step 2: Wash Feeding Sets Thoroughly with Warm Soapy Water
- Step 3: Choose and Prepare a Sterilization Method
- Step 4: Sterilize Feeding Sets According to Instructions
- Step 5: Dry and Store Feeding Sets Safely
Quick Summary
| Key Point | Explanation |
|---|---|
| 1. Inspect Feeding Set Components | Carefully examine all pieces for damage and wear to ensure your baby’s safety during feeding. |
| 2. Thoroughly Wash with Soapy Water | Use mild dish soap and a dedicated bottle brush to remove milk residue and contaminants from all parts. |
| 3. Choose a Reliable Sterilization Method | Options include boiling, electric steam sterilizers, and microwave sterilizer bags; each has unique benefits. |
| 4. Follow Sterilization Instructions Carefully | Adhere to specific timing and techniques for your method to ensure effective sanitization of all components. |
| 5. Properly Dry and Store | Allow items to air dry completely, then store them in a clean, designated space to prevent contamination. |
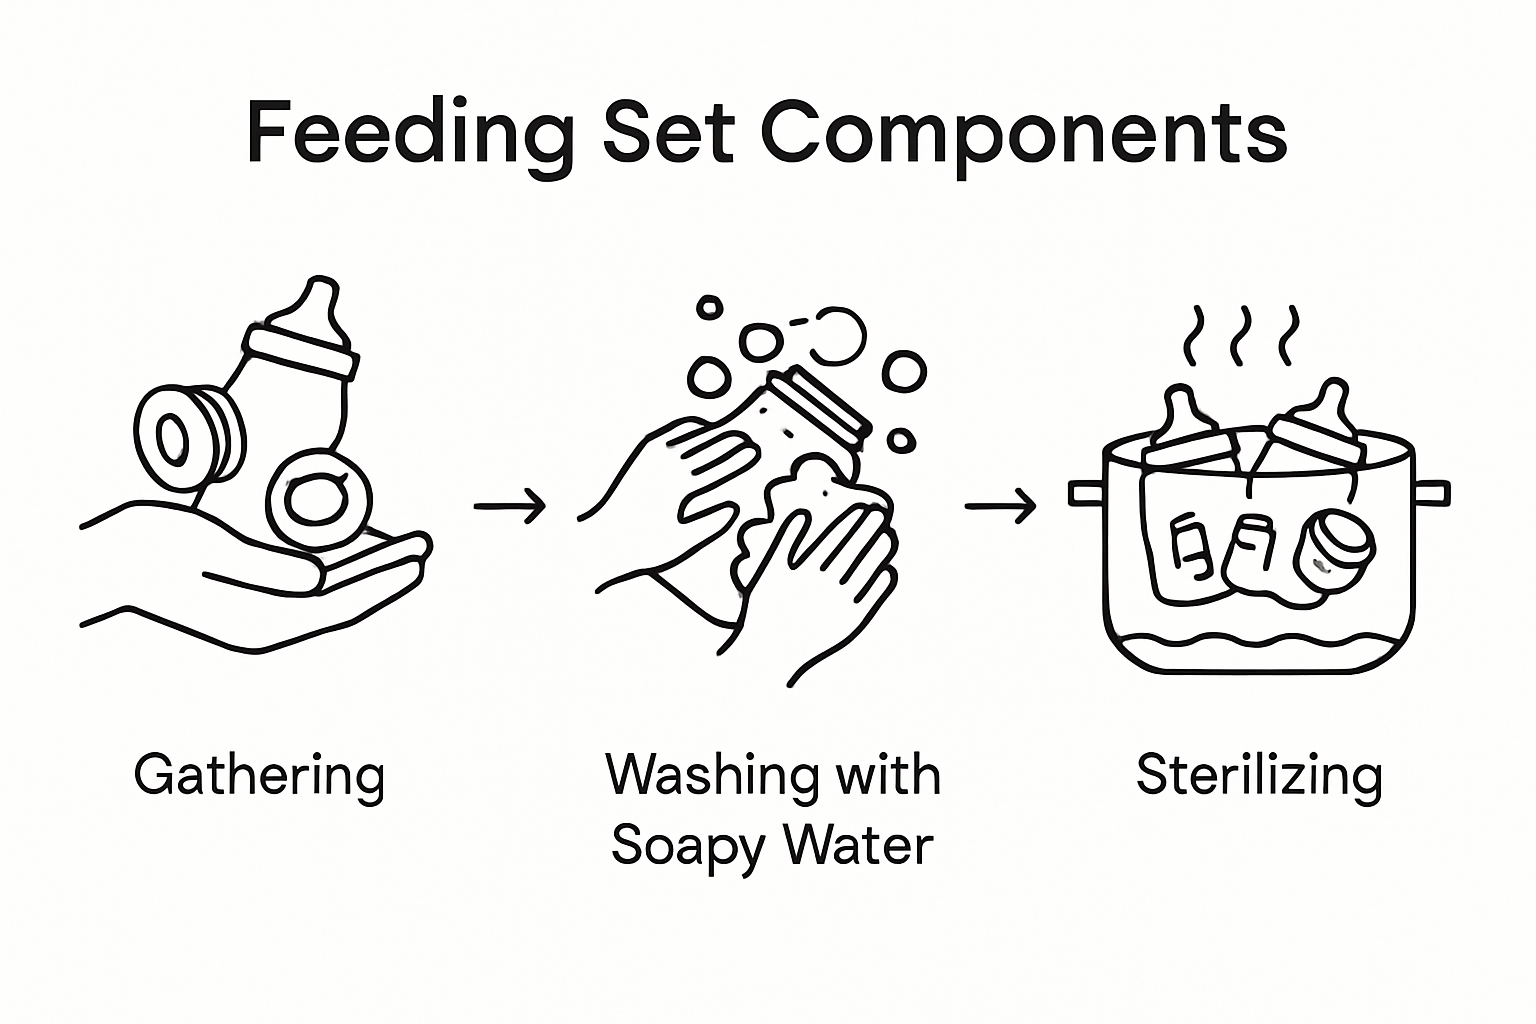
Step 1: Gather and Inspect All Feeding Set Components
Before starting the sterilization process, you’ll need to carefully gather and thoroughly inspect each component of your baby’s feeding set. This initial step is critical for ensuring the safety and hygiene of your infant’s feeding equipment. Proper preparation ensures all items are ready for effective cleaning and sanitizing.
Begin by disassembling the entire feeding set into its individual parts. This typically includes bottles, nipples, rings, caps, and any additional accessories. Spread these components out on a clean, sanitized surface and conduct a careful visual inspection. Look for signs of wear such as cracks, chips, discoloration, or any areas where milk residue might have accumulated. Pay special attention to nipple conditions checking for tears, uneven surfaces, or any deformations that could impact your baby’s feeding experience. If you notice any damaged components, replace them immediately to maintain optimal safety standards.
Organize your components into groups for easier tracking and cleaning. Some parents find it helpful to use a dedicated cleaning tray or mat to keep everything organized during this process. Professional guidance recommends thoroughly examining each piece before sanitizing to ensure no compromised parts remain in your feeding set.
Pro tip: Create a small checklist or take a quick photo of your fully disassembled feeding set. This helps ensure you don’t miss any components during cleaning and provides a reference for proper reassembly after sterilization.
Below is a summary of common feeding set components and inspection tips:
| Component | What to Check For | When to Replace |
|---|---|---|
| Bottle | Cracks, chips, discoloration | Cracked or severely stained |
| Nipple | Tears, deformations, residue | Torn, misshapen, sticky areas |
| Ring/Cap | Warping, trapped debris | Warped, cannot close tightly |
| Accessories | Sharp edges, buildup | Damaged or misshaped |
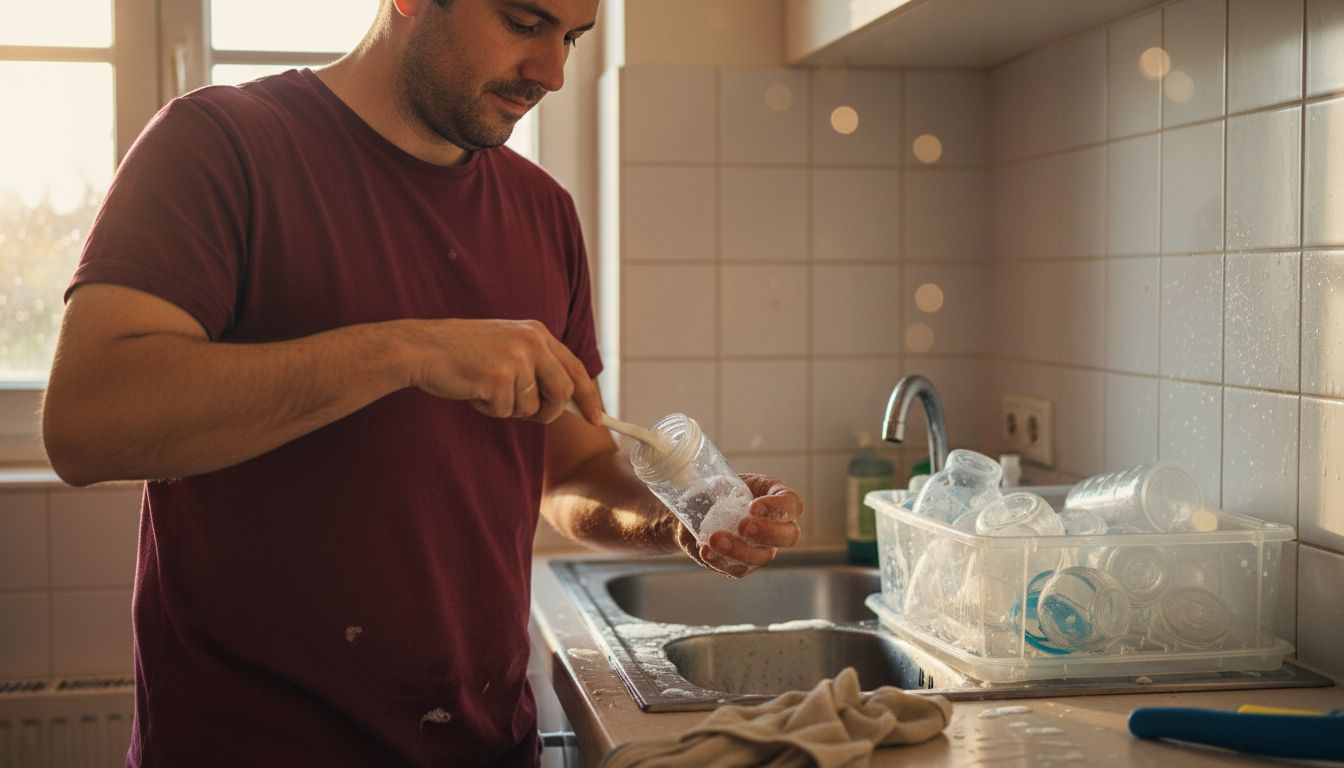
Step 2: Wash Feeding Sets Thoroughly with Warm Soapy Water
Now that you have disassembled your feeding set, it is time to thoroughly clean each component using warm soapy water. This critical step removes milk residue, bacteria, and potential contaminants that could harm your baby. Effective cleaning requires carefully washing each part with hot soapy water using a dedicated bottle brush.
Start by selecting a mild liquid dish soap specifically designed to be gentle and free from harsh chemicals. Fill a clean sink or washbasin with warm water and add a small amount of soap. Use a soft bottle brush with long, flexible bristles to reach inside bottles and clean all interior surfaces. Scrub each component thoroughly paying extra attention to hard-to-reach areas like nipple threads, bottle crevices, and rings. Carefully rinse each item to eliminate all soap residue, as leftover soap can cause digestive issues for your infant.
Make sure to handle each piece with clean hands and inspect them again after washing to confirm no milk deposits or dirt remain. Place the washed components on a clean paper towel or dedicated drying rack, positioning them to allow maximum air circulation and quick drying. The goal is to create a pristine environment for your baby’s feeding equipment.
Pro tip: Designate a separate bottle brush exclusively for cleaning baby feeding items to prevent cross-contamination and maintain the highest hygiene standards possible.
Step 3: Choose and Prepare a Sterilization Method
With your feeding set components thoroughly cleaned, it is time to select and prepare the most appropriate sterilization method to eliminate harmful bacteria and ensure your baby’s safety. Different sterilization techniques can effectively sanitize your feeding equipment, ranging from boiling to specialized electric steam systems.
You have several reliable sterilization options to consider. Boiling remains a classic and highly effective method for most parents. Fill a large pot with water and submerge your cleaned feeding set components completely. Bring the water to a rolling boil and maintain the boil for at least five minutes, which ensures thorough bacterial elimination. Alternatively, modern parents can utilize microwave steam sterilizer bags or standalone electric steam sterilizers for convenient and quick sanitization. Electric steam sterilizers offer precise temperature control and can process multiple items simultaneously, making them an excellent choice for busy parents.
If using an electric sterilizer, carefully follow the manufacturer’s instructions regarding water volume, sterilization duration, and cooling procedures. Some models automatically shut off after completing the sterilization cycle, while others require manual intervention. Always remove sterilized items using clean tongs or thoroughly washed hands to prevent recontamination.
Pro tip: Time your sterilization process right before preparing a feeding to minimize the chance of reintroducing bacteria and maintain maximum hygiene for your baby’s feeding equipment.
Here is a quick comparison of common sterilization methods for baby feeding sets:
| Method | Time Required | Equipment Needed | Key Advantage |
|---|---|---|---|
| Boiling | 5 minutes | Large pot, stove | Highly reliable, low cost |
| Electric Steam Sterilizer | 8-15 minutes | Electric sterilizer unit | Precise, handles multiples |
| Microwave Steam Bag | 3-6 minutes | Microwave, steam bag | Fast and portable |
Step 4: Sterilize Feeding Sets According to Instructions
Now comes the most critical phase of preparing your baby’s feeding equipment ensuring complete elimination of harmful bacteria and potential pathogens. Sterilization requires carefully following specific instructions to guarantee thorough sanitization of all feeding components.
Depending on your chosen sterilization method, precise execution is paramount. If boiling, submerge all cleaned components completely in water and maintain a rolling boil for exactly five minutes. For electric steam sterilizers, measure water precisely according to manufacturer guidelines and position items strategically to allow steam full circulation. Microwave sterilizer bags offer another convenient option with specific time and power requirements that must be followed meticulously. Remember that each sterilization method has unique parameters and timing essential for effective bacterial elimination.
After sterilization, handle components with extreme caution. Use clean tongs or thoroughly washed hands to remove items and place them on a sanitized surface or dedicated drying rack. Allow components to air dry completely before reassembling or storing to prevent moisture accumulation that could promote bacterial growth. Always inspect each piece once more to confirm no water droplets or residue remain.
Pro tip: Set a timer during sterilization to ensure precise duration and avoid potential over or under processing of your baby’s feeding equipment.
Step 5: Dry and Store Feeding Sets Safely
After sterilization, the final crucial step is ensuring your baby’s feeding equipment remains clean and protected until its next use. Proper drying and storage are essential to maintain the sterile condition of your feeding components.
Begin by selecting a clean and dedicated drying area with excellent air circulation. Carefully place sterilized items on a pristine paper towel or unused dish towel positioned in a dust free location. Allow each component to air dry completely guaranteeing no moisture remains which could potentially encourage bacterial growth. Select a protected storage space like a designated clean kitchen cabinet reserved exclusively for sanitized baby feeding equipment. When completely dry, reassemble the feeding set pieces and store them in a sealed container or designated storage bag to prevent dust or potential contamination.
Consider creating a systematic approach to storing your feeding set. Group similar components together and arrange them in a way that minimizes handling and potential recontamination. Keep the storage area away from high traffic zones in your kitchen and maintain a consistent cleaning routine to ensure ongoing hygiene.
Pro tip: Create a dedicated shelf or container specifically for clean baby feeding equipment to streamline your storage process and reduce the risk of accidental contamination.
Keep Your Baby’s Feeding Sets Safe and Hygienic with the Right Products
Ensuring your baby’s feeding equipment is always clean and sterilized is a vital step to protect their health and give you peace of mind. This article highlights the importance of thorough cleaning, inspecting, and sterilizing feeding components to prevent harmful bacteria and contamination. We understand how challenging it can be to maintain this high standard of hygiene daily, especially when juggling your busy family life.
At Skin-Styles.com, we offer a range of family-friendly solutions designed to support your efforts in creating a safe feeding environment. Explore our carefully selected Other Products – Skin Styles collection for items that complement your sterilization routine and help keep all feeding accessories in top condition. From soft cleaning brushes to storage options, our products make maintaining clean and sterile feeding sets easier and more reliable.

Start protecting your baby today by investing in the right tools that simplify sterilizing and storing feeding equipment. Visit Skin-Styles.com to browse trusted products tailored for family care. Take action now to ensure every feeding moment is both safe and comfortable.
Frequently Asked Questions
How do I properly inspect my baby’s feeding set before sterilization?
To properly inspect your baby’s feeding set, carefully disassemble all components such as bottles, nipples, and caps. Look for any signs of damage like cracks or tears that could affect safety or hygiene. Replace any compromised parts to ensure everything is safe for your baby.
What is the best method to wash feeding sets before sterilization?
The best method to wash feeding sets is to use warm soapy water with a mild dish soap. Use a dedicated bottle brush to scrub each component thoroughly, especially hard-to-reach areas, and rinse completely to remove all soap residue before sterilizing.
How long should I boil feeding set components for effective sterilization?
You should boil feeding set components for at least five minutes to effectively sterilize them. Make sure all parts are fully submerged in rolling water during this time to ensure thorough bacterial elimination.
Can I use a microwave to sterilize feeding sets, and if so, how?
Yes, you can use a microwave to sterilize feeding sets using steam sterilizer bags. Follow the specific time and power instructions provided with the sterilizer bag to ensure all components are properly sanitized.
How should I store sterilized feeding sets to maintain cleanliness?
To maintain cleanliness, store sterilized feeding sets in a clean, dust-free area in a designated storage container. Ensure that all components are completely dry before storage to prevent bacteria growth and establish a routine to regularly check and clean your storage area.